Looking for the right Holiday hair style? Then look no further. These are 4 Holiday hair style tutorials to help you find a hair style to suit your mood.
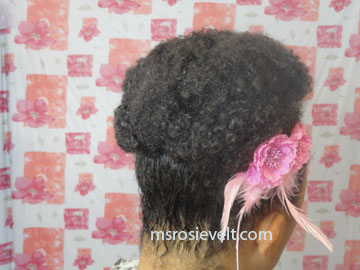
#1 Holiday Hair Style
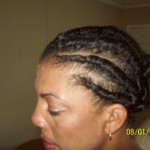
#2 Holiday Hair Style
#3 Holiday Hair Style
#4 Holiday Hair Style

Saturday, December 24, 2011
Sunday, December 4, 2011
Tips for Dealing with Dry Winter Scalp
The dry weather during the cooler months of fall and the colder months of winter may cause your scalp to become very dry, flaky and itchy. All skin cells shed and because the scalp is so dry your scalp may be shedding more skin cells than normal, causing little noticeable white flakes to appear in your hair and an itch that just won’t stop. Not only are the white flakes embarrassing but dealing with a dry scalp can make you feel overly anxious to find a solution before you scratch your scalp raw.
There are several things we can do to our hair care regimen to help combat winter dry scalp that’s causing you flakes and itching.
Shampooing – Limit how often you shampoo your hair and use shampoos that have lower sulfates or that are sulfate free. In the cooler months, frequent shampooing can strip the scalp’s natural oils that provide moisture to the scalp. Also limit the amount of shampoo you use at one time, using just enough to cleanse your hair and scalp. Using too much shampoo makes it harder to rinse all the shampoo out any shampoo left will dry and flake off. Instead of shampooing you can try using a moisturizing conditioner to cleanse your hair and scalp. You hair and scalp will be clean without the harshness of shampoo.
Conditioning – use a moisturizing conditioner after every shampoo and deep condition at least once a month. Moisturizing conditioners help to replenish moisture and nutrients to the hair strands that were stripped away during the shampoo. You can also co-wash, use the conditioner to wash your hair and scalp between shampooing.
Apply oil to your scalp – A dry scalp doesn’t have enough of the natural oil and applying certain oils directly to your scalp can help give your scalp the nourishment it’s missing. Olive, neem, peppermint , jojoba and rosemary are all great oils that can help relieve dry scalp and itching. Try making a hot oil treatment out of oils or purchasing a treatment from your beauty supply store and apply the warm oil directly to your scalp, cover with a towel or cap for thirty minutes before shampooing.
Massage your scalp – After apply the oil, use you the pads of your fingertips to massage your scalp. Massaging increases the blood flow to the scalp and helps to clear any blocked pores, which can release the scalp’s natural oil. A scalp massage also loosens dead skin cells, making them easier to wash away during shampoo or co-wash.
Limit heat – Too much heat can add to scalp dryness, so limit the use of blow dryers, flat irons and curling irons.
These are just a few things that can help with winter scalp dryness. If you have more serious problems with dandruff and inflammation then you may need to check with your doctor or dermatologist.
Friday, November 18, 2011
Tangles and knots
 I’m at the two and half year mark on my natural hair journey. My natural hair is longer than it’s ever been in my entire life and managing this length is becoming quite a challenge. I’ve recently been keeping my curls stretched to help me mange my natural curls. Last week I decided to wear a twist out and that decision proved to be a disaster for me. Not because my twist out wasn’t cute because it was for a couple of days and the rest of the days of the week I wore my hair in a bun. It wasn’t until wash day that I noticed I had major tangled, twisted coils and knots in my hair. For a natural, tangles and knots mean there’s going to be a long detangling session after washing.
 During my detangling session, I swore off twist outs, braids out and any other kind of out. I’ve since relented on my vow but now I know that I must be much more careful when wearing twist outs. I will need to co-wash and detangle my hair after a couple of days instead of wearing the twist out for the entire week.
Thursday, November 17, 2011
Saturday, November 12, 2011
Tuesday, October 25, 2011
Saturday, October 8, 2011
Hair and Face of the Day

My face is and ELF pallatte creation. The pinks and browns are a perfect match. I finished the look with KISS eyelashes.


Wednesday, October 5, 2011
Audio Books - Stuart Woods Hothouse Orchid
To: rosievelt@gmail.com Show details
I am so into listening to audio books. I’ve always loved reading but with kids, a real job and taking care of my wifely duties, I couldn’t squeeze in a good book. That is until I discovered the AUDIO book!!! My life turned completely around. I started knocking out 3-4 books per month. My genre of choice is mystery!! I listen while I’m working, cleaning and driving.
Listening to audio books gives me a calming feeling while keeping my brain stimulated. I don’t know if it’s the fact of having soothing voices in my ear or what but I love them and have just finished Hothouse Orchid by Stuart Woods. This is the 5 th thriller in the Holly Barker series and is read by Carrington McDuffie. This audio book is a thriller that will definitely keep you sifting through the red herrings to figure out who the creep is who’s raping and killing women.
Great listen....on to the next one.
Saturday, October 1, 2011
10 Tips for Protective Style Challenges
In the fall, many YouTubers and healthy hair care websites begin to launch protective hair style challenges. All protective hair style challenges are different but most have the same goal. You are asked to wear your hair in protective styles for a certain length of time to promote healthier hair and better hair retention; when hair is retained then longer hair goals can be meet.
Some of the fall protective hair style challenges are in effect until spring of the next year. That’s about six months. And if you start but are not prepared, then you may not make the most of the hair challenge. I’ve put together these 10 tips to help you make the most of your challenge once you decide to join.
 of the hair challenge. I’ve put together these 10 tips to help you make the most of your challenge once you decide to join.
1. Start a hair journal. You can use any type of notebook, it doesn’t have to be anything special. You want to document your starting point by taking beginning pictures and doing length checks. Then record your current status in your hair journal.
2. Set a reasonable hair growth goal. Hair grows between a fourth and a half of an inch per month. If the protective style challenge that you decide to participate in lasts for three months, then a reasonable hair growth goal is 1 ½” of hair growth, for six months then 3” is reasonable. Write your hair growth goal in your hair journal.
3. If the challenge you’ve decided to join asks for beginning pictures, then go ahead and send pictures. Sending the pictures will help you commit to the challenge. If you’re shy then have someone help you take back shots of your hair or cover your face.
4. Do a search on YouTube for “Protective Hair Style” and begin gathering ideas for styles that you would like to try. You can place videos with hair styles that you like in your favorites, so that you can keep up with the styles you’re interested in.
5. Gather hair clamps, ties and bands that are fee of metal clips to use in your protective styles. Using ouchless bands and clips will help reduce hair breakage while your hair is in a protective style.
6. Moisturize your hair really well and then seal with an oil or butter before placing your hair in protective styles. The ends of your hair will love being moisturized while being tucked away.
7. Be versatile with your protective styles. You can wear buns, braids, twists, wigs and drawstring ponytails to name a few styles. Change the stress points on your hair by parting hair differently or instead of combing your hair straight back every time, swoop your hair to the side then back. You can even wear your hair down once or twice a week.
8. Join healthy hair website communities for support, encouragement and more protective style ideas.
9. Update your pictures and your hair journal regularly and at the end of your challenge, submit your final pictures and hair growth gains to finalize your challenge.
10. Have fun with the different styles that you can create and reward yourself for any short term goals that you meet.
Challenges are a great way to obtain maximum hair retention for a certain period of time. If you decide to join a protective hair style challenge, I hope these tips help you reach your goals.

Thursday, September 29, 2011
Sunday, September 25, 2011
A Quick Homage to the Hairpin!
A life saver? Hum….Maybe not. But it can definitely make a bride’s wedding day, make a bad hair day better and even inspire you to be more creative with hair styles! It’s always lurking around in the bottom of your purse and hanging out in your bathroom drawers. It’s the hairpin!
 When it comes to styling my natural hair, the hairpin and its companion the bobby pin are my very best friends. A vital piece of my styling pie, I use pins when doing my favorite natural hair styles and without pins, I just don’t think my styles will last or stay in place. Designed to be almost invisible, I use the slender, u-shaped piece of wire to secure my up-dos, shape my buns and to keep my natural hairstyle in place.
 The modern day hair pin is made when different lengths of wire are bent in half to form a u-shape, then a few kinks are placed along the two opposite sides to make the finished pin. The pin may vary from two to six inches in length, which helps with placement and to hold several different styles of hairstyles in place. The kinks helps to keep the pins secure during normal movements.
Bobby pins are the next best thing. I use bobby pins to secure my french rolls, pin curls, bantu knots and more. With natural hair, I can pull each side of my hair back and slide bobby pins down each side to secure and I will have an instant Fro-Hawk! I even criss-cross bobby pins for added security.
 The bobby pin is a flat, spring like metal hairpin having the prongs held close together by tension. This double-pronged hair pin slides into hair with the prongs open and then the flexible prongs close over the hair to hold it in place. Bobby pins became popular in the 1920s to hold the new bobbed hairstyles.
Hairpins are typically plain and unobtrusively colored but now some are decorated with beads or jewels on the bend to add beauty and flair to a hair style. Bobby pins are also elaborately decorated with jewels, beads and flowers, that makes any style look great!


Thank you to the person who invented this little life saver!

Friday, September 16, 2011
Cantu Shea Butter Leave In Conditioning Repair Cream

Product Description:
Cantu® shea butter Leave In Conditioning Repair Cream is made with real shea butter and essential oils to replace vital oil in your hair leaving it stronger and healthier with a natural shine.
Cantu® shea butter leave in conditioning repair cream can be used on wet hair as an intensive moisturizing treatment or to tame frizz and fly-aways.
Cantu® Shea Butter Leave In Conditioning Repair Cream helps…
- moisturize dry brittle hair with deep penetrating oil and emollients
- soften, detangle and add shine to hair
- protect hair against heat and sun styling damage
- provide extra protection from split ends and breakage
Directions for:
- Daily Styling – Apply to towel dried hair. Work a generous amount of product into hair beginning at the roots to the tips. Comb through for even distribution. Do not rinse. Apply more to longer hair at the ends or problem areas.
- Leave In Treatment – Apply as directed for “Daily Styling” just after shampooing. Re-apply and cover with a plastic cap overnight for maximum absorbtion and intensive conditioning.
- Frizz Free Hair – Apply daily to split ends or damaged areas. Comb through and let dry naturally.
Cost: $4.99 at Walgreens, Target, Fred's, Walmart
My Review: I heard about Cantu Shea Butter through many of the healthy hair websites and blogs. I read the claims of the condition and decided to give the product a whirl. I've been using Cantu Shea Butter Leave In Conditioning Repair Cream as a leave in and a moisturizer for several months now. I use the repair cream every night to moisturize my hair right before sealing with an oil and not only does this product smell great, it moisturizes my hair without a sticky build-up. The conditioner is light with a creamy consistency. The price is great at $4.99 and the 16 fluid ounce jar will last about a month, maybe a month and a half.

Saturday, September 10, 2011
KISS Premium False Lashes Giveaway
I'm giving 2 pair of Kiss Premium Lashes away to 2 Blog Followers!

Tuesday, August 30, 2011
FOTD - Wet n Wild Sweet as Candy

Face of the Day
Thursday, August 18, 2011

Saturday, August 13, 2011
3 Strand Twists

These are by far my favorite twists. Once you get the concept down then its easy peasy!
Seperate the hair into three sections like you are going to braid and then wrap the 3 strands around themselves. Its that simple. And What a wonderful Twist out!
Check out my tutorial!
Ms RosieVelt!


Friday, August 12, 2011

Thursday, August 11, 2011
Hair and Face of the Day

I used Cover Girl Smokey Shadow Blast on my eyes. Click here for the face tutorial!
A New Face on Charlie's Angels

Annie Ilonzeh is half Nigerian/half Caucasian and she is rocking her natural curls. If she looks familiar it's because she's on General Hospital and has been on the BET series, The Game.
Can't wait to see what she brings to Charlie's Angels.
Ms. RosieVelt
Tuesday, August 2, 2011
My Crackle Excursion!!
 Sun Burst!
This is a simple color to create. Polish two coats of
China Glaze - Sun Worshiper on the base of nails and Wild and Crazy - Fusion Neon on the top half. After completely dry, paint on China Glaze - Black Mesh Crackle. And BAM!

Rejuvinate any old polish by polishing over with China Glaze Black Mesh Crackle Polish. It covers nicks to polish and all!
Monday, July 25, 2011

Sunday, July 24, 2011
Entry to MrsJDaFirstLady 30th Birthday Bash One Company Contest
This is an entry to Youtuber, MrsJDaFirstLady Contest. The contest is for a 30th birthday and to enter I had to use eyeshadow, eyeliner, mascara, blush and lip colors from one company. I used
 LA Colors Chic Eye Shadow Palette.
LA Colors Nutmeg Blush
LA Colors Coal Eye Liner
LA Colors Black Mascara
LA Colors Satin Lip Slick
LA Colors Pink Diamond Lip Gloss
Let me know what you think!
Ms. RosieVelt

LA Colors Nutmeg Blush
LA Colors Coal Eye Liner
LA Colors Black Mascara
LA Colors Satin Lip Slick
LA Colors Pink Diamond Lip Gloss
Let me know what you think!
Ms. RosieVelt
Polish of the Day Sally Hansen

This is a deep brown chocolate cover that goes on smooth and easy. The polish spread evenly with two coats and is simply to die for.
Ms. RosieVelt
Week Two - Hairdrenalin Potion
This weekend marks the end of my second week for the Hairdrenalin Potion Challenge. I'm using the potion every night and wraping my head with plastic like the creator of the potion, Valerie, instructed you to do. I'm waking up with the wet head and frizzy hair every morning. Maybe I'll just have to resolve to having 7 weeks of bad hair days. I don't know what to do.
This is my progress with using the potion for 2 weeks. I'm measuring and will give the exact measurements at the end of 7 weeks.


Wow. Would you call that bra strap length?
Ms. RosieVelt
This is my progress with using the potion for 2 weeks. I'm measuring and will give the exact measurements at the end of 7 weeks.


Ms. RosieVelt
Saturday, July 16, 2011
Organix Moroccan Argain Oil Shampoo and Conditioner

So I'm on the hunt for a really good shampoo and conditioner. My sister was raving about Organix so I purchased both the shampoo and conditioner a few weeks ago. I haven't used the product long enough to give a really good review of it but I will come back and give a throrough review of both the shampoo and conditioner.
My Version of Nikkiemae2003’s Turban
In my constant search of finding new protective styles for my natural hair, I came across this turban style that YouTuber, Nikkimae2003, is rocking in one of her tutorial videos. I Like the style but really didn’t know how I would look wearing a turban so I decided to follow her instructions and give it a whirl. I don’t think it was too bad but I don’t know if I’ll feel totally comfortable wearing the turban out in public. You be the judge.


Let me know what you think and if you've tried the turban style before!
Sunday, July 3, 2011
Summer Hair Style Series
Summer is the right time for easy, breezy hair styles. I don’t know about you but when it’s hot, I don’t want anything making me any hotter than I already am. So in the summer time, I wear hair styles that keep my hair up off of my neck and back out of my face. With my hair out of the way, I’m free to feel the nice warm breeze as it blows across my neck.
These are five of the hairstyles that are featured in my Summer Hair Style Series…


Thursday, June 16, 2011
Summer Style Series #! - Natural Hair Protective Style Tutorial - Stuffed Twists Bun Updo
This is the jump start video of my Summer Style Series!!!
The Shingling Method on Natural Hair
Shingling, in the natural hair community, is simply a concentrated method used to distribute product throughout the hair so that each and every strand of hair is coated with that product. You can simply use your hands, a comb or brush to evenly distribute product and smooth your natural hair during shingling method.
Shingling is so popular because there are so many ways the method can be effective in the natural hair community. Some of the most popular ways are to condition, define and style natural hair using the shingling method. Keep reading....
Shingling is so popular because there are so many ways the method can be effective in the natural hair community. Some of the most popular ways are to condition, define and style natural hair using the shingling method. Keep reading....
Sunday, June 12, 2011
Going Natural’ Requires Lots of Help
‘Going Natural’ Requires Lots of Help
Tired of chemically treated hair, and of visits to salons, many African-American women are turning to YouTube to pick up tips and advice on products.
http://www.nytimes.com/2011/06/09/fashion/hair-care-for-african-americans.html
Thursday, June 9, 2011
Cornrow / Braid Set Fail
To set my hair, I used foam Aphogee wrapping lotion and braided my hair in six large braids. My hair wasn't quite dry when when I woke up this morning, so I used a blow dryer and attempted to dry my hair. I didn't have much time so I had to wing it. The back wasn't to pretty so I pinned the back up.


Wednesday, June 8, 2011
Saturday, June 4, 2011
$33 Outfit of the Night
Hey guys,
I picked this outfit up from Ross. What a buy!
Shirt - $13
Stretch jeans - $7
Open toe shoes - $13
Can't bet the price! Let me know what you think.

Monday, May 30, 2011
Stuffed Twists Tutorial
The mini-twists lasted for two weeks and I couldn’t take it anymore. I didn’t use gel to do the twists so they started to unravel and frizz really bad. Next time I’m going to make some flax seed gel and use that to twist my hair. I’m sure they will last longer then.
 I decided to go with another protective style for the week. I chose the stuffed twists with a bun in the back. This is a super easy style that you can do in less than two hours. I will leave it in a week, so investing a couple of hours in my hair for the week isn’t too bad.
I washed, conditioned and moisturized my hair. I two strand twisted my hair and allowed it to air dry while I was deciding what to do. I went to the beauty store and bought four bags of the 99 cents braiding hair. I think the stuffed twist look better with the cheap hair.
To do this style you want to start by placing a small pony tail in the back of your hair, this will serve as your base and is where you will start to pin your bun. Part and gel a section of your hair. Separate the weave and use a cigarette lighter to burn the hair right in the bend of the weave. Pressed the burned piece to form a point. Use the burned piece at the start of your twist and then twist your hair over the weave.
There you have it, a simple stuffed twist. Twist the weave all the way to the end and it will coil, pin the end into the base pony tail and start with a new section.
Super simple!!!!
Ms. RosieVelt
Jump Start Your Hair Growth
Black women can grow long hair. I know, I know, I know….I didn’t think that we could grow hair past our shoulders but I was wrong. And oh boy, how learning this little tidbit has changed my life. I’ve become obsessed with growing my hair to its full potential and I want to share my knowledge with everyone that I come in contact with.
Jump starting your hair growth journey isn’t hard to do. It just takes commitment from you to learn your hair and to learn how to take care of it. Click on the link to learn how to jump start your hair growth journey.
Ms. RosieVelt
Jump starting your hair growth journey isn’t hard to do. It just takes commitment from you to learn your hair and to learn how to take care of it. Click on the link to learn how to jump start your hair growth journey.
Ms. RosieVelt
Preparing my Hair for Bed
One major part of my healthy hair care journey regimen is preparing my hair for bed at night. Preparing my hair at night for bed helps my hair retain moisture and wards off hair breakage. My hair is super moisturized in the morning and I tell you I’ve shaved at least 5 minutes off my morning routine because I don’t have to spend as much time doing my hair.
Preparing your hair for bed is simply moisturizing, sealing and covering your hair before you go to bed. It’s an essential step in growing long black hair. You should really make preparing your hair for bed a part of your hair care regimen. Click on the link to read how to prepare your hair for bedtime.
Preparing your hair for bed is simply moisturizing, sealing and covering your hair before you go to bed. It’s an essential step in growing long black hair. You should really make preparing your hair for bed a part of your hair care regimen. Click on the link to read how to prepare your hair for bedtime.
Confessions of an Almost Product Junkie
 I started my healthy hair journey in May, 2010, mainly because I’d burnt the back row of my hair out with a straightening comb. After that, I started researching how to grow my hair back really fast, when I stumbled upon a world that I didn’t even know existed; a world with black women, who were growing their hair long and beautiful. I wanted my hair to be long and beautiful, so every product the women who I was looking at were using, I had to have it. Whether the product was good for my hair or not, I had to try it. I found myself getting caught up in the products that I had to have for my hair that I started to lose focus on what I really wanted, which was healthy hair. I was starting to use way too much product on my hair. When I detangled my hair after I washed, the comb was full of hair. I couldn’t understand why my hair was betraying me. I stepped back, reevaluated my regimen and figured that I was doing too much to my hair. I went back to the basics, clean hair and scalp, conditioned and moisturized hair that is sealed with oil, and low manipulation and protective styles. That’s enough!!! I’ve been back to the basics for about three weeks now and my hair is already doing much better. I have less hair in my comb when I detangle and my hair is starting to flourish. I’m glad that I came to my senses before I’d gone broke buying every product that I learned of. I will not be a product junkie.

Subscribe to:
Posts (Atom)